


DIY - Impeller replacement for Yamaha F150
- Atle Høidalen

- 5. juli 2022
- 7 min lesing
In our series of "do it yourself" articles we are now focusing on impeller replacement. The impeller ensures that the engine receives water for cooling and is located at the top of the underwater housing of the outboard. How often this should be replaced may vary from model to model, but on my Yamaha F150 it should in theory be checked every year and replaced if it shows signs of wear. The job itself may seem daunting, but is not really very complicated. There are lots of good tutorials on Youtube on the subject, so there is plenty of learning material out there.

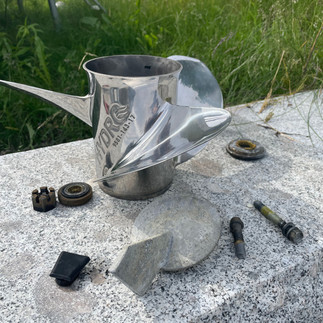
This article focuses on replacement of the impeller on a 2007 model Yamaha F150, but the principles and procedure will probably coincide with other brands and engine sizes. You can choose to replace only the impeller, or also replace part or all of the contents of the impeller housing itself. I ordered a "water pump repair kit without housing" from Telmo Control AS. This set contains the impeller itself, the metal housing in which it sits, gaskets, new bolts etc.

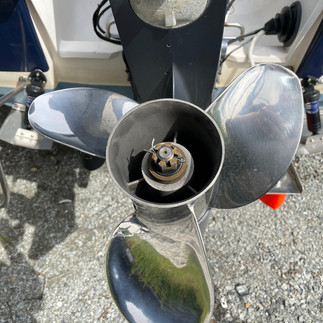
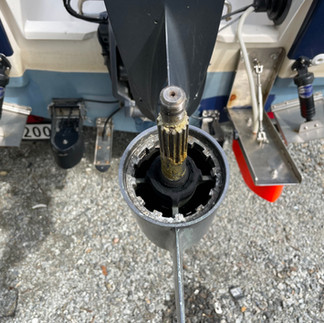
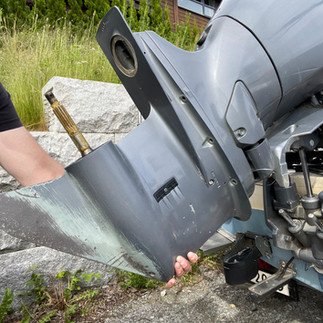
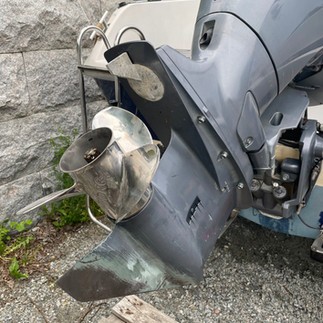
It is not necessary to remove the propeller to replace the impeller, but it does make the underwater housing a little easier to handle when you take it off. In addition, this is a great opportunity to clean and lubricate the propeller shaft. You start by removing the locking pin, unscrewing the bolt and washer, removing the propeller and then finally removing the washer at the bottom. Note that different outboard motors have different layouts on the components located on the shaft. See to that you lay the parts out in the order you take them off, so it's easier for you to put them back on. My propeller housing needed a proper cleaning.


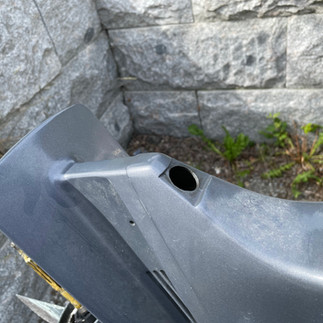
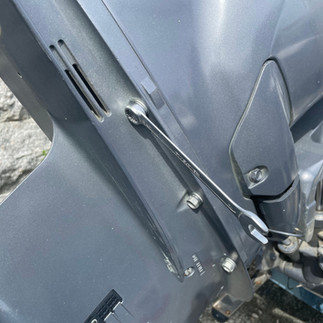
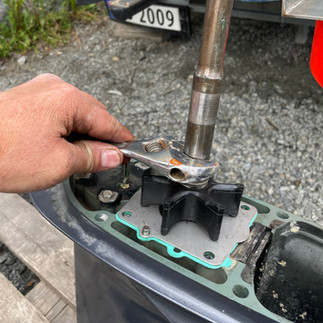
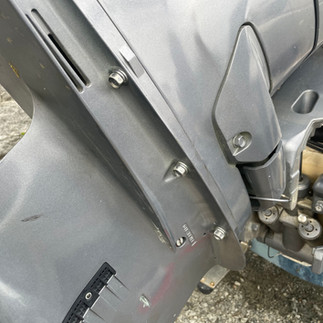
The next thing we do is to remove the guide fin at the bottom of the underwater housing. To loosen this, remove the rubber capsule in the picture and unscrew the bolt with a 12mm socket wrench. On the underside inside the hole where the guide fin is, you will then find a new bolt, which you remove using a 14mm socket wrench.


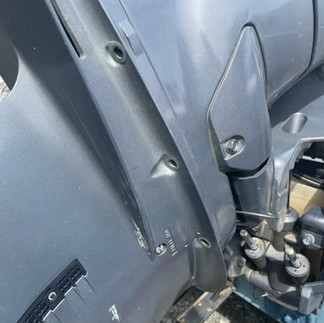
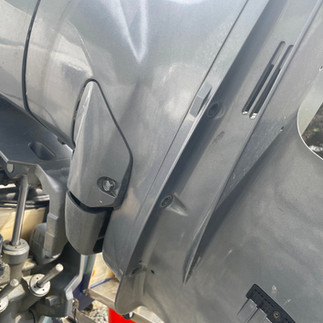
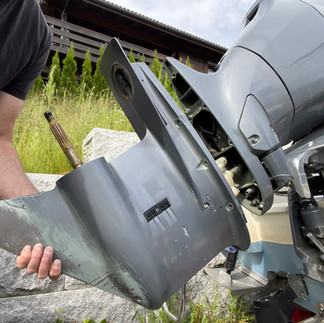
There are now three bolts on each side of the underwater housing, six in total, which must be unscrewed. Be aware that when the last bolt is removed, there is no longer anything to prevent the underwater housing from falling out, normally it will be a bit stuck, but it is a good idea to be ready to hold it again. For this job you use a 14mm wrench.


When all bolts have been removed, you are ready to lift off the underwater housing. Now you should have prepared something to put the underwater house on, you should be able to have it secured so that it stands upright. Grab the lower part and start rocking it a little, slowly but surely it will detach from the engine itself and slide out. One thing that is worth mentioning is that you can have the gear to the engine in neutral when you do this.


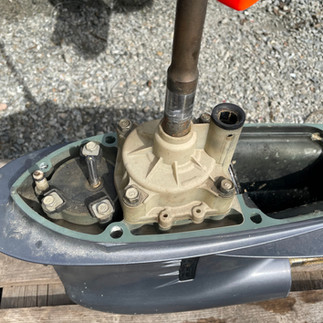
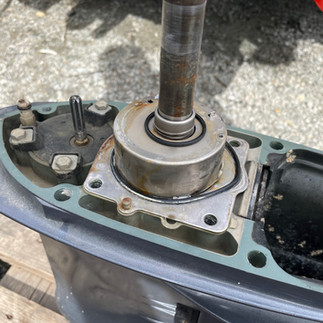
I chose to put the underwater housing on a Europallet, where it was fairly stable so that I could work with the impeller housing itself. Next to the impeller housing you will find a small shaft, this is the gear shaft. It is very important that you do not turn it while working on replacing the impeller. Doing so will complicate the job of reassembling the underwater housing afterwards.

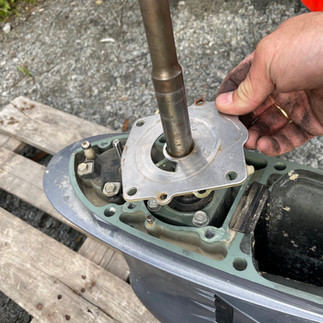
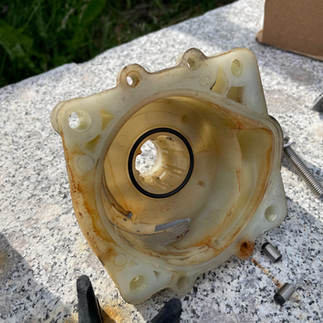
The impeller housing is screwed on with four bolts which you loosen with a 12mm socket wrench. When these have been removed, you can lift off the plastic housing and you will then see a metal cup (if it does not come with the plastic housing up). Inside this cup you will find the impeller.


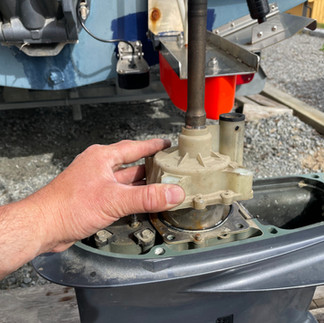

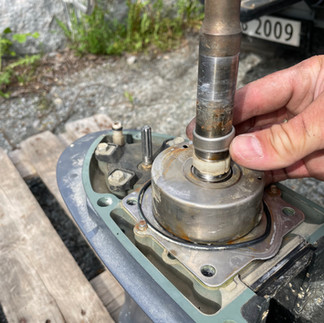
On the shaft above the metal cup itself there are three washers and above it a plastic bearing with a metal collar on the outside. You can now remove these. You can use a screwdriver to gently loosen the metal collar. Note that the three washers should be in a special order, the middle washer is a bit wavy and it is very important that this is between the other two when you put them back on.


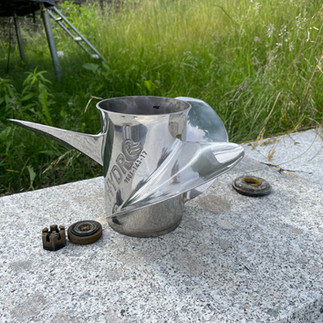
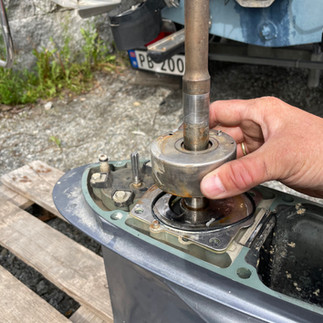
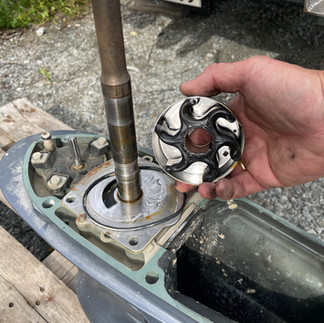
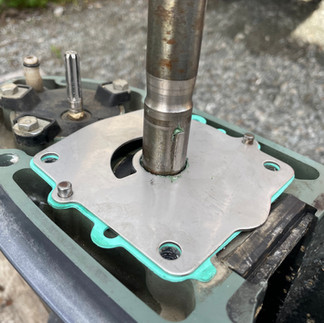
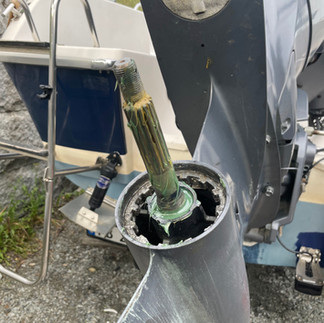
Now you can lift off the cup itself, in my case the impeller also followed up. Note which way the impeller blades are bent, it is very important that you mount the new impeller with the impeller blades bent the same way. Lay the parts out in order so you have control over which order they are to be reassembled. The metal cup, o-rings and impeller will be replaced.


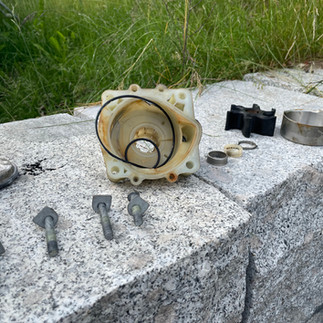
At the bottom of the shaft towards the underwater housing itself, there are now two gaskets left, a metal gasket against which the impeller sits, and below that a sealing gasket against the underwater housing itself. You do not always have to change these, but since they came with the set I ordered from Telmo Control, I also changed these. Here, however, I recommend that you make an assessment of whether it is necessary to replace these. This is because in order to loosen these, you have to remove a woodruff key (kind of crescent-shaped locking pin that sits in a groove in the shaft itself). Yamaha is apparently known for this patent, and the challenge here is that this woodruff key often gets stuck in the shaft and has to be drilled out. If you are lucky, it is enough to take a thin screwdriver and gently force the pin out from the top of the groove, but if you are unlucky, the woodruff key is stuck. This was also the case here, and if I had known how difficult it was to get it loose, I would probably have chosen not to change the gaskets in this round. I ended up drilling carefully into the top of the wodruff key so that I got behind it and pushed it out.

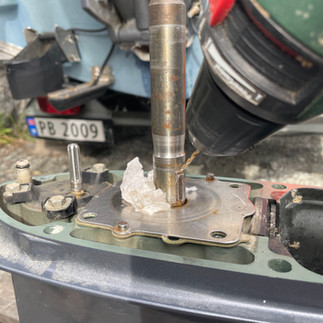

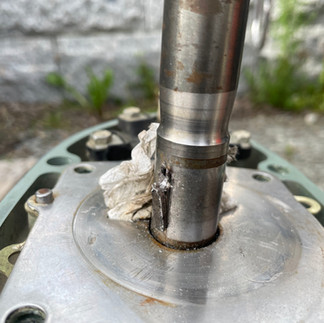

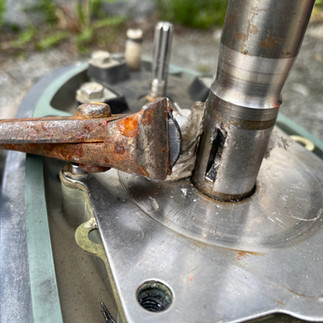
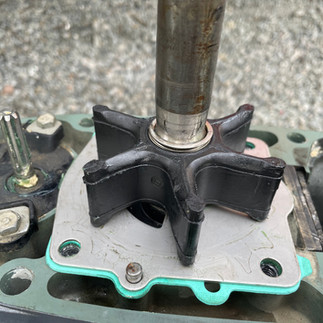
When the woodruff key is out, make sure to sand/grade any notches in the groove in the shaft before inserting a new woodruff key. On Yamaha's shafts, this key must be pressed in carefully, but it is not enough just by hand force. But before you do this, remove the old gaskets, clean the surface and put on the new ones. When this is done, insert the key and then you can put on the new impeller. Feel free to place a thin film of marine grease on the plate itself and on the impeller plates, this makes the process of putting on the metal cup afterwards much easier.


The next step is to put the three washers, the plastic bearing and the metal collar back on. These are not included in the set I bought, so I reuse the ones I have. Put on the three washers first, remember to put the wavy disc in the middle. Then put on the plastic bearing and finally the metal collar. You can use a wrench, grab the shaft and lift it up while tapping gently so that the metal collar is pressed down over the plastic liner and press the discs against the impeller so that there is no longer any vertical play in the shaft.


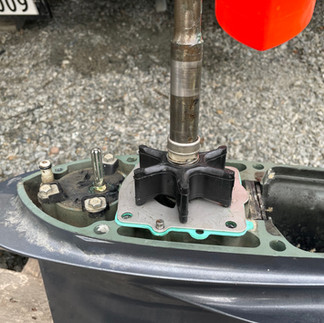

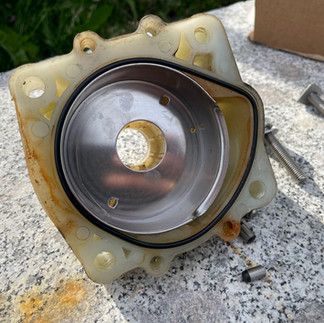
Now it's time to put the new metal cup into the plastic housing itself. Clean the plastic housing and place a thin film of marine grease in the groove around the hole in the top inside. Here you then insert the smallest o-ring that comes with the set. Then you insert the metal cup itself, this has two notches that fit in the two small holes in the plastic housing, so that it only fits one way in the plastic housing itself. When this is done, you can apply a thin film of marine grease inside the metal cup, as well as in the groove in the plastic housing around the metal cup. Then you put the big o-ring in this slot. Then thread the plastic housing with the metal cup and o-rings on the shafts and place it carefully on top of the impeller. Remember to set the house the right way.


Now you have to push the housing itself down on the impeller. Here it is very important that you remember to do this at the same time as you turn the shaft itself WITH the clock. Take a rag or paper and hold around the top of the shaft, turn the shaft WITH the clock while pressing the housing down over the impeller. Now you must also make sure that the outer o-ring does not come loose during this process. When you have pressed the plastic housing all the way down against the metal gasket, fasten the housing with the four bolts. I got four new bolts in the set and therefore used these. Remember the metal washers that sit on the bolts.


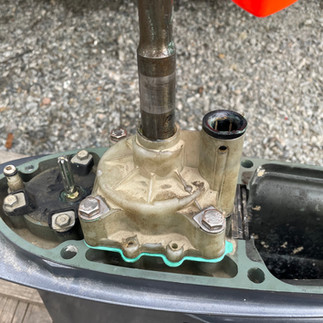
Now the impeller housing is completely assembled and the underwater housing is ready to be put back on. But first you should apply plenty of marine grease to the grooves in the top of the shaft, feel free to apply a thin layer on the entire shaft as well. Then you do the same with the gear shaft and you can also take a thin layer of marine grease on the actual "flushing nozzle" on the house as well as the small nozzle next to the gear shaft that leads water to the speed gauge.
Be very careful when putting on the underwater housing, you first insert the shaft itself so that it stops. At this point you must make sure that the flushing nozzle, the gear shaft and the nozzle of the speed gauge also hit their respective connections. Then rock a little carefully so that the grooves in the shafts slide into place, if everything now sits where it should, the underwater housing will slide nicely all the way in. Then you screw on the six screws, three on each side, the bolt that is inside the hole behind the guide fin/sacrificial anode, fasten the sacrificial anode itself, lubricate the shaft and fasten the propeller. Remember that different outboard motors and different propellers must be tightened with different torque, on my motor it is 55nm, but you have to adapt this to the holes for the locking pin in the shaft.


I would estimate that this whole process is done in 1-2 hours if this is the first time you are doing this. This of course depends on several factors, e.g. if the woodruff key in the shaft down in the impeller housing is stuck, it will take longer. For someone who has done this sometimes, a lot has probably been done in a scant hour. In my opinion, a job you can do well yourself, and you will learn something in the process as well. Everything you need of parts and tools for this job you get at Telmo Control AS at Skedsmokorset, they are usually also helpful with tips and advice if you need it.
PS: Remember to check that water comes out of the tell tale hole on the engine before using it. You can use a couple of muffles and a garden hose for this, but not all motors are able to suck enough water to flush out of the flushing nozzle in this way. It is therefore recommended to perform this test with the engine immersed in water covering the entire underwater housing, either in a barrel or on the water.
Good luck!
Best regards, Atle